
Lockdown 2021, a time where we all find ourselves back at home, with a bit more time on our hands again. Although the restrictions are slowly starting to ease (here's hoping) it is more crucial than ever that we do what we can to keep ourselves and those around us safe. So, we thought it might be handy to provide you with a Face Mask Tutorial. Face coverings are considered mandatory within New Zealand at the moment, so why not get crafty and save some waste by making one from home?!
This tutorial is created using a pattern from LILA by Liv (Liv is a local fashion designer in Wellington and also works for us here are The Sewing Depot). And, if you don't have the facilities or time to create one yourself, we have some Pleated Style Masks available for sale.
Now, let's get into this tutorial!
You will need:

- LILA by Liv Face Mask Pattern
- Fabric, preferably a breathable fabric such as cotton or linen (we used left over scraps from another garment. You will only need bout 30cm deep x 40cm wide for one adult sized mask.
- Elastic (about 15cm-18cm depending on size of adult mask, can be adjusted for kids too)
- Measuring Tape
- Scissors
- Thread
- Sewing Machine
- Iron and Ironing Board

(For this tutorial, we used the Singer HD6805C Heavy Duty Electronic Home Sewing Machine)
Step by Step:
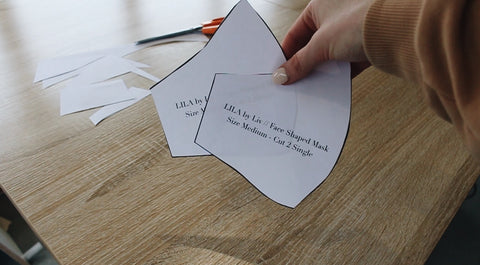
01/ Cut out your LILA by Liv Face Mask Pattern (following the black outlines).

02 / Lay out your fabric, folding it in half so you have 2 layers to cut through.
03 / Pin your pattern pieces onto the fabric and cut out 4 layers to create your face mask.


04 / Pin the first 2 layers together down the curved edge, then sew a 1cm seam allowance (repeat this step for the other 2 layers). This will make up the front and back of your mask.


05 / Once you have the fronts and backs of your mask sewn, pin them right sides together along the top edge (as pictured) sew a 1cm seam allowance.


(Repeat this step by sewing along the bottom edge of the mask)
06 / Once you have assembled the mask, turn it through one end, so you have the right side showing.


07 / Using an iron, press along the top and bottom edges of the mask. Then press over the mask towards the centre seam, this will help form the curved shape of the mask.

08 / After pressing the mask, turn the open ends inwards by 1cm and press again, so all raw edges are hidden .


09 / Measure and cut your elastic, for a medium sized mask we have measured 2 strips at 17cm long (this measurement depends on how stretchy your elastic is and how tight you want the mask to be).

10 / Insert the elastic into the mask, place one end of the elastic towards the top of the edge opening on the mask, and then tuck the other end down the bottom of the edge opening. This will create an ear loop.

11 / Sew down the open edge, backstitching over where the elastic is sitting to keep it secure (repeat on the other side)

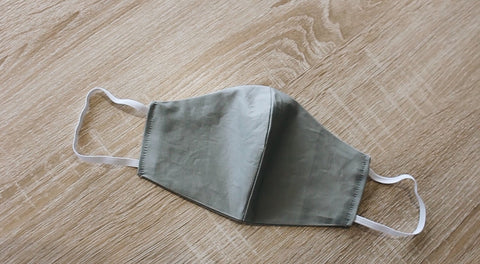
12 / Your mask is complete! Give it one final press with the iron and it is good to go.

Creative hacks:
- If your chosen fabric is quite thin or lightweight, try adding a third layer for more protection (OR, you can leave an opening in the bottom or side of your mask to slip in a filter).
- If you don’t have access to the right sized elastic, you can also use hair ties, bias binding or ribbon to create straps/ties.
- Made your mask but the elastic is too loose or too tight? No worries, just unpick either end of the mask where you inserted the elastic, then either tuck the elastic in further if it is too loose OR cut some longer elastic to replace if it was too tight.